DIY

DIY: Giant knitting needles

Knitting… Some people say it’s old fashioned, but I say it’s creative and peaceful. Yes, it is repetitive, long and can be boring, but I use this time to kind of ‘switch off’ for a while. It’s my time to relax, think and create something at the same time ^^ I’ve seen quite a few images online of giant knitting tools and poufs, blankets and scarves made from them. I wanted to buy myself a pair of needles but they were either not big enough, or too expensive! (mine have a diameter of 16mm)

So I though – DIY time!

I didn’t need much either:

  1.  long rod of wood of the thickness you want your needle to be
  2. wood carver
  3. sand paper – very smooth
  4. saw

Image
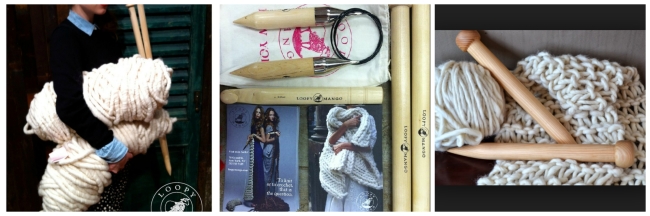
A few inspo images, I do not claim any of these photos mine, they’re from Pinterest.

Image

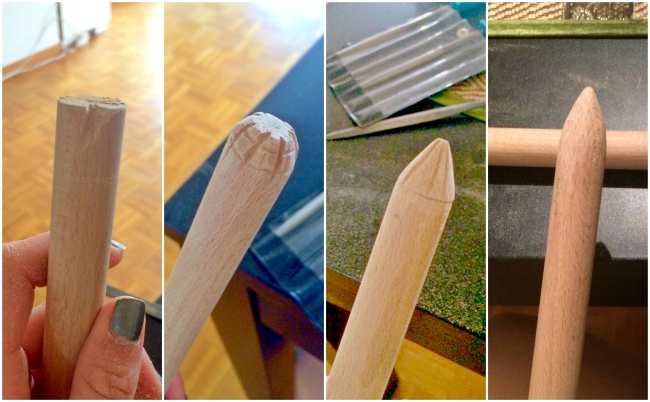
So I just used a wood carving tool. You could use anything really from rough sand paper to file. I slowly worked the corners, breaking them down to form the point at the top. Next step: smoothing. Since these needles will be used with beautiful yarn 😉 it needs to be as smooth as possible not to damage the yarn. I used the softest sand paper I found at the hardware store. It ended up being very soft!

photo 4 (1)

photo 2 (3)

photo 1 (3)

I’m looking at patterns online for a possible living room pouf DIY project ^^ I’m thinking of making a post about it too. Feel free to message of comment for DIY requests!

Thanks for reading!

DIY: leather card holder

I finally got the tools I’ve impatiently been waiting for to make this DIY project! Even more exciting, I get to use the leather I bought from Morocco.

tools needed:

  1. leather (at least a foot squared)
  2. leather scissors
  3. leather puncher
  4. studs
  5. ruler & pen

ImageAll tools needed. Pretty basic, simple and easy to find.

ImagePut a template card in the middle of a rectangle piece of leather (aprox. 20cm x 30cm). Fold it as shown on the picture and cut. Hold punch on the areas shown and add the stud on the inner fold of the leather envelope.

ImageThanks for reading!

Follow my blog with Bloglovin

DIY bio pesto

We’ve been keeping our own garden on our balcony for a while now and we’ve had these basil pots which needed harvesting. Our plants are grow naturally and with no poisonous chemicals (: so we’re going to make ourselves some good organic and bio pesto.

all we needed was:

  1. fresh basil leaves
  2. butter
  3. finely grated Parmesan cheese
  4. 1 small glove finely chopped garlic
  5. salt & pepper
  6. cooking pot

for about 200g of basil leaves, let two regular spoons of butter melt into the pan. add the finely chopped basil leaves into the melted butter and let it cook at medium heat for about 3 mins. add a bit more butter (depending of owns preference ~), increase the heat and add the garlic and let it cook for 1 min at high heat. reduce the heat to medium low and add about a regular spoon of Parmesan. more or less according to taste.

Thank you for reading!

Follow my blog with Bloglovin